
How to Restore Shower Grout Without Replacing Your Tiles
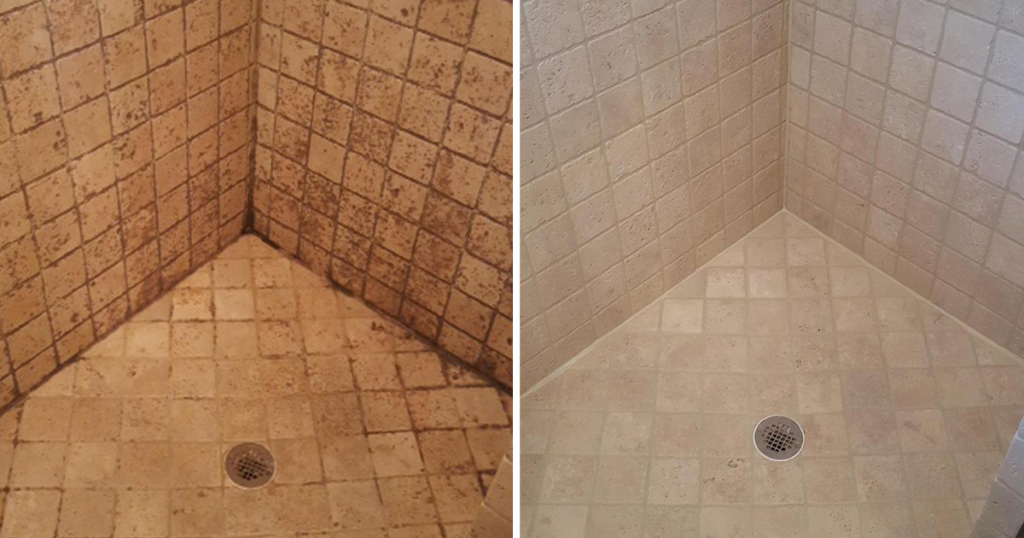
Worn or damaged shower grout does not always mean you need to remove and replace your tiles. With the right shower grout restoration process, you can refresh the grout, improve the appearance of your shower and address damaged grout while keeping suitable existing tiles in place. Over time, shower grout can become stained, cracked, mouldy, loose or discoloured. Constant moisture, cleaning products, movement and everyday use can all affect grout. The good news is that damaged grout does not automatically mean a full bathroom renovation. In many cases, a professional can remove the old grout, prepare the joints and install new grout while leaving suitable existing tiles in place. What Is Shower Grout Restoration? Shower grout restoration focuses on repairing or replacing damaged grout while keeping suitable existing tiles in place. Shower grout restoration is the process of bringing worn or damaged shower grout back to a cleaner, stronger and more consistent condition. Depending on the condition of your shower, restoration may include: The Grout Crew provides a range of tile and grout restoration services, including regrouting, grout colour sealing, deep cleaning, tile repair and tile sealing. The exact process depends on how badly the grout has deteriorated and whether the tiles and waterproofing system remain suitable. The key point: you can often restore the grout without disturbing tiles that are still sound and properly bonded. Can You Restore Shower Grout Without Replacing Tiles? Intro: Yes, in many situations, damaged grout can be removed and replaced without disturbing suitable existing tiles. If your tiles are still in good condition, there may be no reason to replace them simply because the grout has deteriorated. A professional shower grout restoration service can remove failing grout from the joints and install new grout around the existing tiles. This approach can be particularly useful when: However, grout restoration cannot fix every underlying problem. If tiles are loose, the substrate has moved or there is a suspected waterproofing failure, further investigation may be necessary. 7 Steps for Shower Grout Restoration 1. Inspect the Shower Grout A proper inspection should come before any grout is removed. The first step in shower grout restoration is checking the condition of the existing grout and surrounding tiled area. Look for: This inspection helps determine whether you need local grout repair, complete regrouting or additional bathroom repairs. It also helps avoid replacing tiles unnecessarily. The Grout Crew’s inspection and restoration process starts by assessing the condition of the tiles and grout before recommending the appropriate solution. 2. Remove the Damaged Grout Removing failing grout gives the new grout a clean and stable joint to bond with. Old grout needs proper preparation before new material goes in. Simply applying new material over badly damaged grout may not provide the result you want. During professional shower grout restoration, the damaged grout is carefully removed from the relevant joints while taking care around the existing tiles. The goal is to remove the failing material without damaging the tiles that you want to keep. This is one reason professional preparation matters. Tiles can chip if grout removal is carried out incorrectly or with unsuitable tools. 3. Clean and Prepare the Grout Joints Clean joints help create a better surface for replacement grout. After removing the damaged grout, the joints need to be cleaned and prepared. Dust, loose particles, soap residue and other contamination can affect the new grout if you leave them in place. Proper preparation also gives you an opportunity to identify problems that may have been hidden by the old grout. If you find damaged tiles or gaps that need attention, deal with those issues before completing the shower grout restoration. For heavily stained surfaces, The Grout Crew also provides grout and tile deep cleaning, which can help remove built-up dirt, mould and stains before restoration. 4. Replace the Old Grout New grout can give an ageing shower a noticeably cleaner and more finished appearance. Once the joints are prepared, new grout can be applied around the existing tiles. The right grout depends on the shower, tile type, joint size, exposure to moisture and desired finish. For some shower restoration projects, epoxy grout can provide a durable option with good resistance to stains and moisture. The Grout Crew offers professional epoxy regrouting for homeowners looking to restore worn or damaged grout without automatically replacing their existing tiles. The service includes inspection, deep cleaning and restoration, followed by sealing and protection where appropriate. 5. Restore the Shower Silicone Grout restoration should not ignore failed silicone around the shower. Grout and silicone perform different jobs, so replacing grout does not automatically solve problems with old silicone. Check areas such as: If silicone has become cracked, separated, mouldy or loose, it may need replacement as part of the wider shower grout restoration project. The Grout Crew provides tile sealing and re-silicone services as part of its wider bathroom and tile restoration work. New Zealand’s Building Performance guidance also highlights the importance of properly sealed joints and shower penetrations to help prevent water from reaching concealed building elements. 6. Clean the Restored Shower Proper cleaning helps reveal the difference after grout restoration is complete. Once the new grout has been installed and cured according to the product requirements, the shower can be cleaned appropriately. Avoid using harsh cleaning products simply because the old grout was difficult to clean. Regular cleaning and good bathroom ventilation can help keep the restored grout looking better for longer. New Zealand’s Building Performance guidance explains that wet-area surfaces need to be impervious, easily cleaned and appropriately ventilated under Building Code Clause E3. If your existing tiles are in good condition, professional shower grout restoration can make a significant visual difference without changing the tile design. 7. Maintain the Restored Grout Good maintenance can extend the life of your newly restored shower grout. After restoration, give the grout and surrounding areas suitable care. Simple habits can help: Regular maintenance does not make grout completely maintenance-free, but it can help you identify
Leaking Shower or Damaged Grout? 7 Signs Your Shower May Need Professional Repair
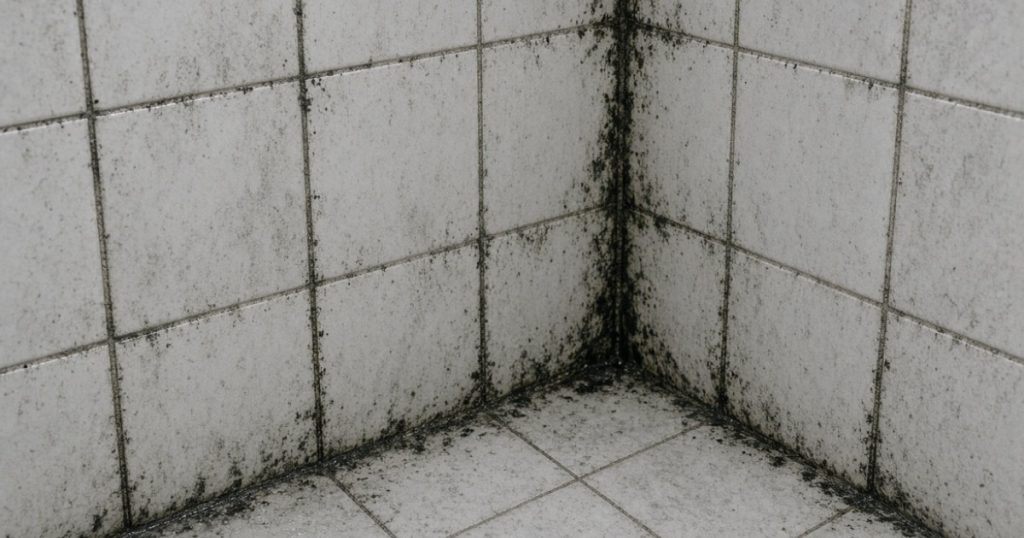
A leaking shower often begins with what appears to be a minor issue, but it can escalate into significant damage over time. Small amounts of water on the shower floor, cracked grout, or deteriorating silicone may not seem urgent at first. However, these are often early indicators that your shower is no longer effectively containing water. Arranging professional leaking shower repair at an early stage can help stop moisture from spreading into the areas behind tiles, walls, or flooring. In New Zealand homes, tiled showers depend on effective waterproofing and properly sealed joints to withstand regular water exposure. Guidance from Building Performance, part of the Ministry of Business, Innovation and Employment (MBIE), emphasises the importance of correctly sealing shower penetrations to reduce the risk of water damage.👉 https://www.building.govt.nz/building-code-compliance/e-moisture/e3-internal-moisture/well-sealed-shower-penetrations-prevent-water-damage/ If you notice any changes in your shower area, it is best not to wait for a major leak to develop. A professional inspection can help determine whether the issue is related to grout, silicone, tiles, seals, or another component of the shower system. For further general guidance on bathroom waterproofing and tiled showers, BRANZ also provides useful resources:👉 https://www.branz.co.nz/ Signs You May Need Leaking Shower Repair Knowing the early warning signs can help you deal with a shower problem before it becomes a bigger repair. Not every damaged shower needs a complete renovation. In many cases, the right repair or restoration work can address the problem without replacing the entire bathroom. Here are seven signs worth checking. 1. Cracked or Missing Shower Grout Damaged grout is one of the first things to inspect when your shower starts showing signs of wear. Grout fills the joints between tiles and helps keep the tiled surface neat and protected. Over time, regular water exposure, movement, cleaning products and general wear can cause grout to crack, crumble or disappear from sections of the shower. Cracked grout does not automatically mean that your waterproofing has failed. However, it should not be ignored, particularly when the damage appears across several areas or is combined with other signs of moisture. Professional shower grout repair can restore damaged joints and help protect the surrounding tiled surface. Depending on the condition of the grout, regrouting may also be an option. For bathrooms that need a more durable solution, The Grout Crew also provides👉 https://thegroutcrew.co.nz/services/re-grout-with-epoxy/professional epoxy regrouting designed to provide a durable, stain-resistant finish. You can also learn more about grout restoration services here:👉 https://thegroutcrew.co.nz/services/ 2. Mould or Dark Staining Around the Shower Persistent mould around grout and silicone can point to a moisture problem that needs more than regular cleaning. Bathrooms naturally produce moisture, especially during hot showers. Good ventilation helps manage that moisture, but mould that repeatedly returns around shower joints, corners or silicone deserves closer attention. Tenancy Services explains that poor heating and ventilation can contribute to mould and dampness in homes. For rental properties, bathroom ventilation is also covered by Healthy Homes requirements.👉 https://www.tenancy.govt.nz/maintenance-and-inspections/heating-and-ventilation/ Mould does not always mean you have a leaking shower, but recurring growth around damaged grout or deteriorated silicone can be a useful warning sign. If cleaning no longer solves the problem, consider whether the underlying grout, silicone or moisture management needs attention. The Grout Crew also offers👉 https://thegroutcrew.co.nz/services/mould-cleaning-removal/mould cleaning and removal services as part of its bathroom restoration solutions. 3. Loose, Cracked or Damaged Tiles A tile that moves, cracks or starts to separate should never be treated as purely a cosmetic issue. Tiles can become damaged for several reasons, including impact, movement, age or problems with the surface beneath them. A loose tile can also leave gaps where water may reach areas that should remain protected. If only a small number of tiles are affected, replacing the damaged tiles may be more practical than removing the entire tiled area. However, the surrounding grout, seals and waterproofing should also be assessed. The Grout Crew provides👉 https://thegroutcrew.co.nz/services/tile-repair/tile repair services to restore damaged tiled surfaces and help homeowners avoid unnecessary replacement where repair is suitable. More information on full tile restoration services is available here:👉 https://thegroutcrew.co.nz/services/ 4. Silicone Has Cracked, Shrunk or Started to Peel Old silicone is easy to overlook, but damaged seals can leave vulnerable joints exposed to regular water. Look closely at the corners of your shower, around the shower base and along areas where different surfaces meet. If the silicone has cracked, separated, shrunk or developed gaps, water can find its way into places it should not. This is where shower silicone replacement can make an important difference. Removing failed silicone and applying a suitable new seal can help protect vulnerable joints and improve the appearance of the shower. The Grout Crew provides👉 https://thegroutcrew.co.nz/services/tile-sealing-re-silicone/tile sealing and re-silicone services to help protect tiled surfaces from moisture and wear. You can also explore related waterproofing and sealing services here:👉 https://thegroutcrew.co.nz/services/ 5. Water Appears Outside the Shower Area Water showing up where it should not is one of the clearest reasons to investigate a possible shower leak. If you regularly find water on the bathroom floor after showering, dampness around the shower entrance or moisture appearing outside the shower area, do not simply mop it up and move on. The source could be a damaged seal, grout issue, shower door problem, plumbing issue or a waterproofing concern. The exact cause needs to be identified before choosing the right repair. This is why professional shower leak repair should focus on finding the source rather than simply covering the visible symptom. For more information on bathroom water damage risks, see MBIE guidance:👉 https://www.building.govt.nz/ 6. A Damp Smell Keeps Returning A musty smell can sometimes indicate that moisture is staying where it should not. A bathroom can smell damp for several reasons, including poor ventilation, mould, wet towels or condensation. But if the smell is strongest around the shower and keeps returning even after cleaning, inspect the shower more closely. Pay attention to the grout, silicone, corners and areas around the shower base. Look for discolouration, soft or damaged materials and signs of persistent moisture.